You’re probably staring at a pile of tabs right now. One page says you need a fast monitor first. Another says spend most of your money on the graphics card. Someone else insists console is the smarter move. Then you add a keyboard, headset, chair, desk space, and suddenly a “simple beginner setup” feels expensive and oddly complicated.
That’s where many beginners waste money. They buy parts in isolation instead of building a setup that fits how they play.
The best gaming setup for beginners isn’t the flashiest desk on social media, and it isn’t the absolute cheapest collection of parts either. It’s a balanced battle station that runs the games you care about, feels comfortable after long sessions, and leaves room to upgrade later without replacing everything.
- Plan your budget around the whole setup — system, monitor, and peripherals — not just one flashy part
- Consoles win on simplicity and value; gaming PCs win on performance, the biggest library, and upgrades
- On a PC, size your budget around the graphics card for 1080p, then pair a balanced CPU
- The monitor shapes the day-to-day experience more than beginners expect — prioritize a fast 1080p panel
- Skip the hype extras like excess RGB and oversized cases; spend on parts that affect performance and comfort
Table of Contents
Your Guide to Building a Great First Gaming Setup
A good first setup starts with restraint. Most beginners don’t need premium hardware, oversized desks, ultra-high-end accessories, or a complicated streaming layout on day one. They need a system that feels reliable every time they sit down to play.
That means making decisions in the right order. Start with the kind of games you play. Then choose your platform. Then build around the screen, controls, and physical space you’ll use every day. That order matters because a setup for ranked FPS matches isn’t the same as one for MMOs, story-driven games, or occasional streaming.
What actually matters first
A value-first setup usually comes down to five priorities:
Stable performance: You want games to run smoothly at the settings your hardware can realistically support.
Durability: Cheap gear that creaks, peels, disconnects, or develops button issues gets expensive fast.
Comfort: If your chair, desk height, or monitor position is wrong, even good hardware feels bad.
Upgrade flexibility: A beginner setup should give you room to improve one piece at a time.
Spending discipline: Extras are fine after the foundation is solid.
Practical rule: Buy for the games you’ll play this month, not the imaginary use case you might have a year from now.
If you already know you want to make videos or stream your gameplay later, it helps to think ahead without overbuilding. For creator-focused planning, this 2026 guide for gaming creators is useful because it frames gear choices around actual content goals instead of hype.
What usually turns into wasted money
Beginners often overspend on looks before performance, or on specs they can’t use. A fast display paired with weak hardware is frustrating. A fancy keyboard with poor build quality still feels bad. A giant headset that sounds decent but hurts after an hour isn’t a good buy.
The setup that lasts is the one that feels coherent. Every part supports the next part. That’s the standard worth aiming for.
Start Here: Define Your Gaming Goals and Budget
Before you pick a platform or compare parts, get specific about what you want this setup to do. “Gaming” is too broad to be useful. The hardware and accessories that make sense for competitive shooters can be different from what feels best for MMOs, casual co-op, or streaming.
Pick your real use case
Start with the games and habits that will define most of your sessions.
FPS players: You’ll care more about responsive controls, a smooth display, and a mouse that tracks well than about visual max settings.
MMO and RPG players: Comfort matters more because sessions run long. A solid headset, usable keyboard layout, and enough storage matter a lot.
Single-player players: You may care more about visual quality, screen size, and immersion than shaving every bit of input delay.
New streamers: You need a little more system headroom and gear that handles voice clearly, but you still shouldn’t build a studio before you know you’ll use it.
If you’re not sure whether a custom build is for you, browsing a few realistic examples of a budget prebuilt gaming PC can help anchor expectations before you start buying separate parts.
Set a budget that covers the full setup
One of the biggest beginner mistakes is budgeting only for the machine and forgetting the monitor, headset, keyboard, mouse, and basic comfort items. That’s how people end up with a decent system and a weak overall experience.
A useful benchmark exists here. One guide estimates that €700–€800 is enough for a strong starter gaming setup, while another says $1,000 can cover a solid entry-level PC setup with a 1080p monitor, basic peripherals, and a headset.
Split the budget by priority, not by hype
Think in layers instead of shopping randomly.
| Priority | What it should cover |
|---|---|
| Core platform | PC or console, plus enough performance for your actual games |
| Display | A screen that matches the platform and the kinds of games you play |
| Controls | Keyboard and mouse, or controller, with reliable build quality |
| Audio | A headset that stays comfortable and gives clear voice chat |
| Physical setup | Desk space, seating, and cable control |
Your budget should protect the experience, not just the hardware list.
If money is tight, cut decorative extras first. Don’t cut the mouse you’ll use every day, the headset you’ll wear for hours, or the chair support that keeps you comfortable. Value doesn’t mean buying the cheapest option. It means buying the pieces that won’t annoy you into replacing them early.
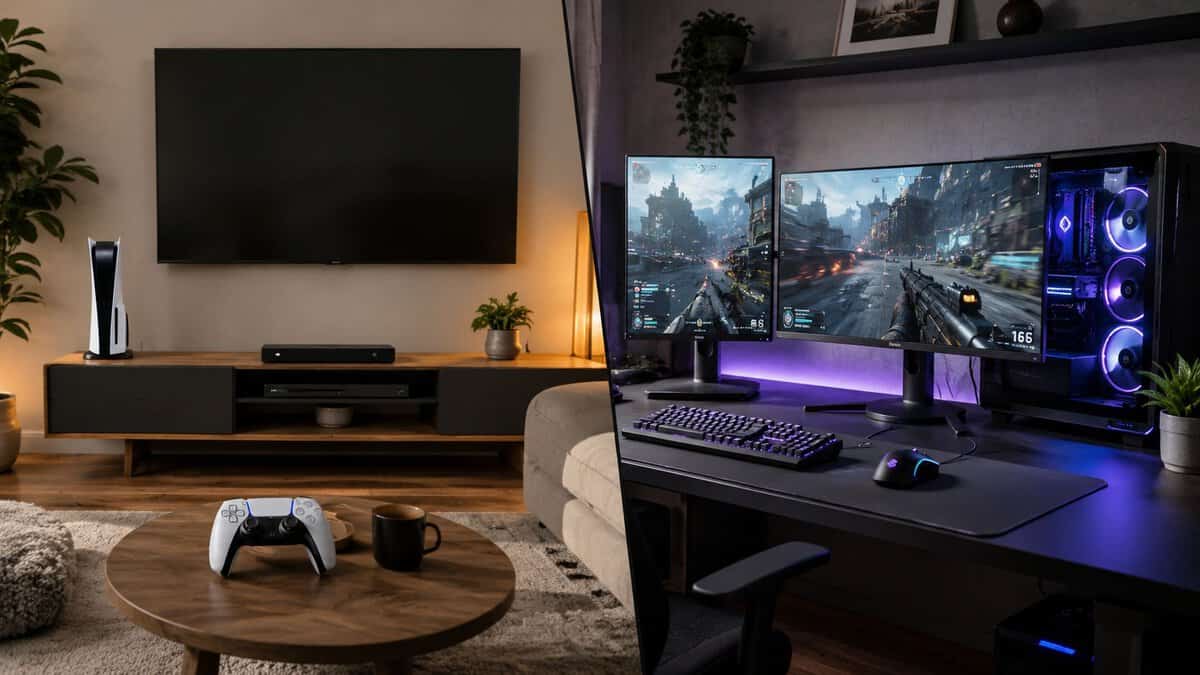
The First Big Choice: Gaming PC vs Console
This decision shapes the rest of your setup more than anything else. It affects cost, flexibility, desk layout, upgrade options, and even what kind of accessories make sense.
A lot of advice around this gets tribal fast. That’s not useful when you’re trying to build your first gaming space on a sensible budget. What matters is what fits your habits.
For a deeper side-by-side breakdown, this guide on console vs PC gaming is a solid companion read. The short version is simpler.
When a gaming PC makes more sense
A PC is the better choice if you want one setup that handles gaming plus school, work, voice chat, mods, browsing, and eventual upgrades. It also gives you more control over peripherals. That matters if you care about keyboard feel, mouse shape, display tuning, or building a desk setup that doubles as an everyday workstation.
PC also wins if you like adjusting settings to prioritize smooth performance over eye candy. Beginners often assume that flexibility is only for enthusiasts. It isn’t. Even basic control over graphics and display settings can make games feel much better.
The downside is friction. A PC setup asks more from you. You need to think about compatibility, software updates, drivers, and where your money goes inside the build. If you choose poorly, you can end up with an unbalanced system.
When a console is the smarter value
A console is easier. You buy the box, connect it to a TV or monitor, sign in, and start playing. For plenty of beginners, that simplicity is worth more than upgrade flexibility.
Console also works well if your main goal is relaxed gaming from a couch, local multiplayer, or straightforward online play with friends who already use the same platform. You spend less time tweaking and more time playing.
The trade-off is that your setup is less adaptable. You won’t upgrade one internal part at a time, and the machine doesn’t replace a general-use desktop. Your long-term path is more about accessories than hardware changes.
Buy a PC if you want a platform. Buy a console if you want an appliance.
A quick comparison that’s actually useful
| Decision factor | Gaming PC | Console |
|---|---|---|
| Ease of setup | More involved | Simpler |
| Upgrade path | Strong | Limited |
| Use beyond gaming | Excellent | Narrower |
| Input choice | Very flexible | More standardized |
| Desk battle station potential | Higher | Good, but usually simpler |
| Maintenance | More hands-on | Lower effort |
What I’d tell most beginners
Choose console if you want low friction, mostly play from a sofa or simple desk, and don’t care much about upgrading internals.
Choose PC if you want the best gaming setup for beginners in a desk-based form that can grow with you over time. It’s the better long-term home for players who expect to add a second monitor later, try streaming, use the same system for daily tasks, or get picky about controls.
Neither path is wrong. Wrong is forcing yourself into the more complicated option when you don’t want what it offers.
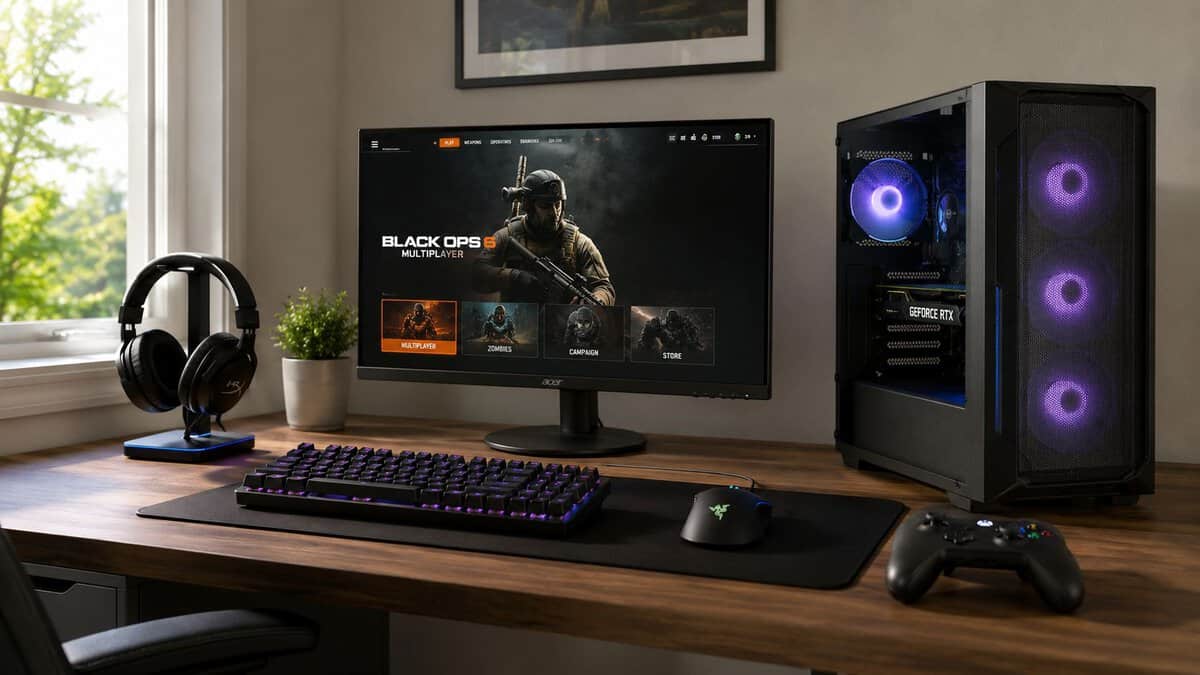
Building Your First Gaming PC Core Components for 1080p
You sit down for your first real desk setup, install a few games, and find out fast that one bad part choice can drag down the whole experience. That is why a beginner build should aim for a clear target instead of chasing specs. For most new players, that target is 1080p.
1080p keeps the full battle station in balance. The PC stays affordable, monitor choices stay wide, and you avoid the common mistake of overspending on internal parts while cutting corners on the screen, chair, or desk setup that determines how the system feels every day. If you are building your first setup to last, balanced beats flashy.
A sensible starting point is 16GB of RAM, a 1TB SSD if the budget allows it, and a graphics card that is strong enough for modern games at 1080p without forcing expensive upgrades everywhere else. Common value picks in that range include the RTX 4060 and RX 7600 class when matching hardware to display targets.
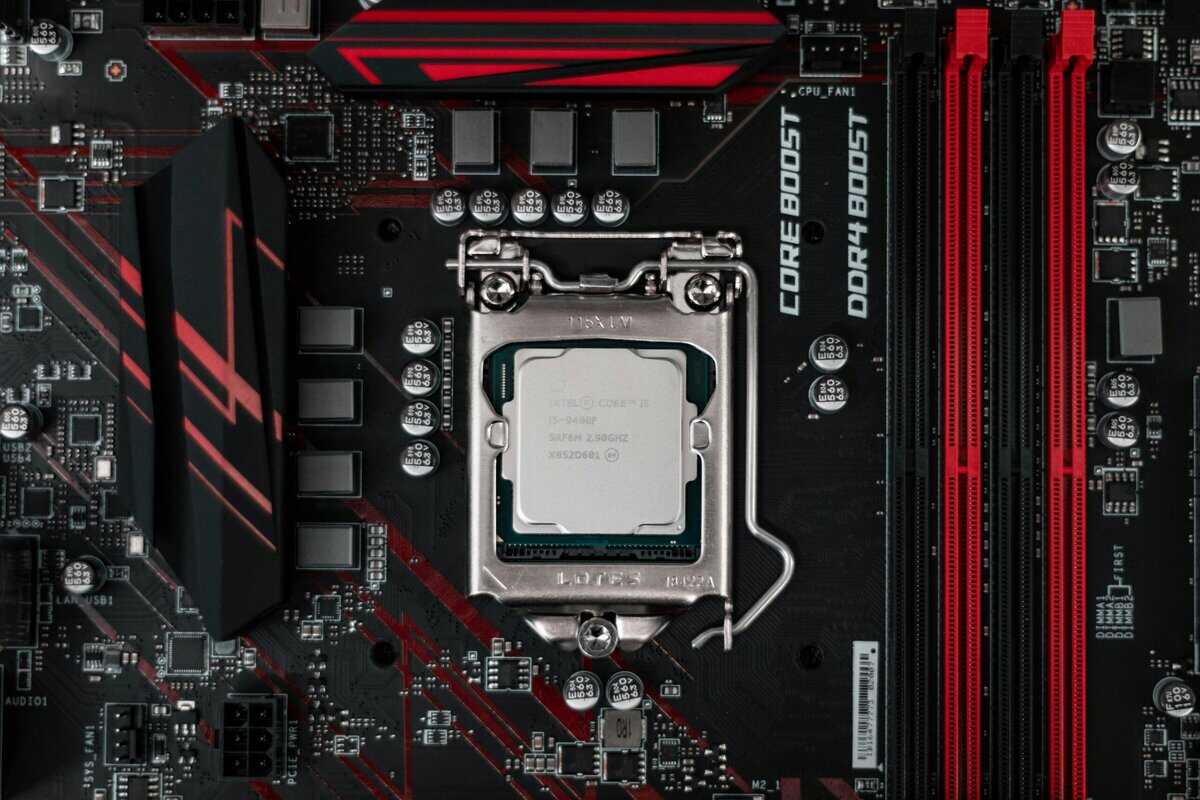
Start with the graphics card
The graphics card has the biggest impact on what settings and frame rates you can expect. Pick it first.
For a first 1080p machine, the sweet spot is entry-to-midrange. That gets you smooth performance in a wide mix of games without pushing you into a larger power supply, a pricier CPU, or cooling upgrades you do not need yet. Spend too little here and newer games start forcing compromises early. Spend too much and the rest of the setup suffers, which is how beginners end up with a strong GPU sitting next to a weak monitor and a bad chair.
If you want a clearer sense of what offers the best value in this tier, this guide to the best budget graphics card options is a useful checkpoint before you buy.
Build around the GPU, then make the rest of the system support that choice cleanly.
Pair the CPU for balance
Once the GPU is set, choose a processor that matches it. For most first-time gaming builds, a current Core i5 or Ryzen 5 class CPU is where the value is. That level gives enough performance for mainstream gaming, general desktop use, and light background tasks without paying extra for CPU headroom that will sit idle.
The trade-off is simple. A weaker CPU beside a capable GPU can cause uneven frame pacing in some games. A stronger CPU paired with a modest graphics card usually means money went into the part that matters less for gaming performance at this resolution.
Keep the pairing honest. Midrange GPU, midrange CPU.
Memory and storage that keep the system pleasant to use
Cheap builds often feel bad outside the game before they feel bad inside it. Usually the problem is memory or storage.
RAM: 16GB is the standard starting point for gaming. Go to 32GB if you already know you will stream, keep lots of apps open, or use the same machine for heavier school or work tasks.
Storage: Use an SSD as the main drive. Boot times, game loads, updates, and everyday use all feel better.
Capacity: 500GB works if money is tight, but it fills fast. 1TB is the more comfortable floor for a setup that will not need an early storage upgrade.
Those choices matter because this guide is about a full setup, not just a parts list. Money wasted on an oversized CPU or vanity case is money not spent on storage space, a better monitor match, or a more durable desk setup.
The parts beginners overlook
Motherboard, case, cooling, and power supply are not exciting, but they decide whether the PC is quiet, easy to build, and upgrade-friendly a year from now.
A poor case can run hot and loud. A cheap power supply can limit future GPU upgrades or cause instability. A cramped motherboard can make cable routing, fan placement, and storage expansion more annoying than they need to be. Beginners do not need premium versions of these parts. They need reliable ones with good airflow, enough clearance, and a little room to grow.
That is the value-first approach in practice. Spend where performance changes your games. Spend enough where durability affects daily use. Cut the parts that are only there to look expensive.
A clean beginner blueprint
| Part | What to aim for |
|---|---|
| GPU | RTX 4060 or RX 7600 class for 1080p |
| CPU | Core i5 or Ryzen 5 class |
| RAM | 16GB |
| Storage | 1TB SSD if possible |
| Power supply | Reliable unit with enough room for future upgrades |
| Case | Good airflow and enough internal clearance |
If you plan to stream casually or multitask heavily, add headroom with more memory and a bit more cooling. If the goal is straightforward gaming, keep it simple. A balanced 1080p build gives beginners the best shot at a setup that plays well now and still makes sense when the rest of the battle station improves around it.
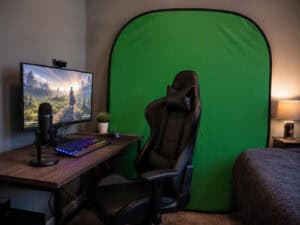
Choosing Your Peripherals: The Gear You Actually Touch
Sit a beginner at a desk with a decent system and cheap peripherals, and the weak spots show up fast. The frame rate might be fine, but the mouse skips, the headset gets hot, and the monitor makes fast games feel blurry. That is why a first battle station should be planned as a whole. The hardware, display, input gear, and comfort setup need to make sense together.

Monitor first, because everything follows it
The monitor usually has the biggest effect on how the setup feels day to day. For specific picks, see our budget gaming monitor guide. It decides how sharp the image looks, how smooth motion appears, and whether your PC or console is being pushed too hard for little real benefit. Beginners often overspend here by buying a high-resolution or very high refresh display that their system cannot use properly.
For a first setup, 1080p is still the safest value pick. It keeps hardware costs under control, looks good at common desk distances, and gives more room in the budget for a better chair, desk, or headset. If you mainly play competitive shooters, prioritize refresh rate and motion clarity. If you play story games, RPGs, or a mix of console and PC titles, panel quality, screen size, and color consistency matter more than chasing the highest number on the box.
If you want help sorting options by the specs that matter, Gamer Hardware’s monitor database is useful for filtering screens without relying on marketing language.
Use a simple rule. Match the monitor to the system you already have, or the one you realistically plan to buy. A balanced beginner setup with 1080p performance makes more sense than a fancy display that forces compromises everywhere else.
Keyboard and mouse should fit your hands, not a trend
Keyboard and mouse quality shows up every single session. A flashy board with poor stabilizers or inconsistent switches gets annoying in games and in basic typing. A mouse with the wrong shape can feel bad within an hour, even if the sensor is technically good.
For keyboards, durability matters more than extras. Look for a solid frame, keycaps that do not feel thin, and switches or keys that feel consistent across the board. Mechanical keyboards often last longer and feel better than the cheapest membrane options, but there is no reason to pay extra for features you will never use. Detachable cables, hot-swap sockets, and RGB lighting are nice bonuses. They are not the reason a keyboard is good.
For mice, fit comes first. FPS players should care about reliable tracking, low weight, and a shape that supports their grip. MMO players can benefit from extra buttons, but only if those buttons are easy to reach and easy to tell apart by feel. In both cases, a comfortable medium-priced mouse beats an awkward premium one.
If you want a practical starting point, this guide to a gaming keyboard and mouse combo does a good job narrowing the field without pushing overpriced gear.
A good mouse disappears in your hand. That is the goal.
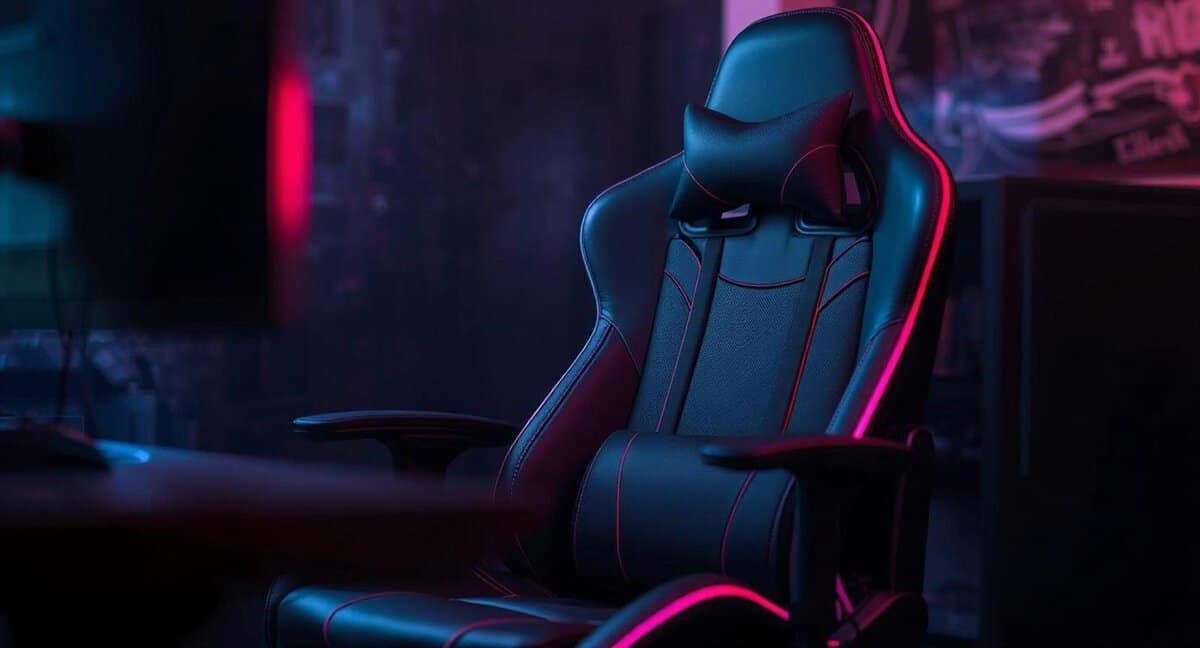
Headset choices that hold up
Most beginner headsets sound acceptable for a week. The real test is whether they still feel good after a long session and still work six months later. Common failure points are simple: weak hinges, rough ear pads, bad cable strain relief, and a microphone that makes voice chat harder than it should be.
Comfort should lead the list. Weight, clamp force, ear cup size, and pad material matter more than exaggerated bass or fake surround features. For team games, mic clarity matters too. Teammates do not need studio audio, but they do need to understand you without background hiss or muffled speech.
A few buying rules save money here:
Choose comfort over flashy tuning.
Check hinge quality and cable durability.
Prioritize clear voice chat over gimmick features.
If you wear glasses, pay extra attention to clamp force and pad softness.
Good peripherals make a starter setup feel finished. If the monitor suits your system, the keyboard feels solid, the mouse fits your hand, and the headset stays comfortable, you avoid the upgrades that beginners usually regret buying twice.
Putting It Together: Assembly, Ergonomics and Configuration
Once the parts are on your desk, the last step is where a lot of beginners unwittingly undercut their own setup. Good gear still performs badly if the build is cramped, the monitor is in the wrong place, airflow is poor, or the display never gets set to the refresh rate you paid for.
Build with compatibility and airflow in mind
Before assembly, confirm the basics. Make sure the CPU socket matches the motherboard, the RAM type is correct, the graphics card fits the case, and the power supply has enough capacity for the system you’re building.
Technical setup guides consistently push a compatibility-first workflow and warn beginners about mismatched parts, weak power supplies, poor airflow, and forgetting to tune display settings in the operating system. For flexible budget builds, 650–750W is treated as a safe power range.
A few habits make the build cleaner and easier:
Install the core platform carefully: Seat the processor, memory, and cooler without rushing.
Plan cable paths early: Better cable routing helps airflow and also makes maintenance less annoying.
Leave breathing room: Front intake and rear exhaust airflow matter more than decorative clutter.
Use a reliable power supply: This is not the place to gamble on the cheapest part in the cart.
If your desk gets messy fast, a focused guide to PC cable management can save you a lot of trial and error.
Ergonomics that improve every session
A setup that hurts your neck or wrists won’t feel good no matter how well it benchmarks. Put the monitor so you’re looking straight ahead, not down at the desk or up at a shelf. Your shoulders should stay relaxed, your arms should rest naturally, and your mouse space should feel open instead of cramped.
For MMO players and anyone who sits for long stretches, this matters even more. Slight posture issues become obvious after a few hours.
A comfortable setup often improves the experience more than a minor hardware upgrade.
First boot checks most beginners miss
After the system turns on, finish the job.
Install current drivers: Especially graphics drivers.
Update the operating system: Stability fixes matter.
Set the monitor refresh rate correctly: Many new setups run at a lower default setting until you change it manually.
Check audio devices: Make sure the headset mic and output are set correctly.
Test temperatures and fan noise: Listen for anything unusual before you settle in.
If you’re planning to add facecam later, don’t guess blindly when the time comes. A practical primer on choosing a YouTube camera can help you avoid buying a camera that’s overkill for a simple beginner gaming setup.
The best gaming setup for beginners isn’t finished when the boxes are opened. It’s finished when the whole space feels stable, comfortable, and ready to use without workarounds.
Frequently Asked Questions
New to building the best gaming setup for beginners? These are the questions first-timers ask most.
How much should a beginner spend on a gaming setup?
There is no single number, but plan your budget around the whole setup — PC or console, plus a monitor and peripherals. Split it by priority: put the most into the parts that affect performance and comfort daily, and keep the extras modest until you know what you actually need.
Is a gaming PC or console better for beginners?
A console is the simpler, lower-friction value pick — plug in and play. A PC costs more up front but offers higher frame rates, the biggest game library, mods, and upgrade flexibility. Most beginners who want the easiest path are happy with a console; choose a PC if you value customization and long-term flexibility.
What should I buy first?
Start with the screen and the core system. On PC, the graphics card drives 1080p performance, so size your budget around it and pair a balanced CPU. The monitor matters more than most beginners expect — a good high-refresh 1080p display makes everything feel smoother.
What do beginners commonly waste money on?
Flashy extras are the usual trap — excessive RGB, oversized cases, premium coolers for modest CPUs, or a high-resolution monitor a budget GPU cannot drive. Put that money toward a better GPU, a faster panel, or a comfortable chair instead.
Do I need expensive peripherals to start?
No. A reliable budget mouse, keyboard, and headset are plenty to play and compete. Spend on the gear you physically touch only after the core system and monitor are sorted — comfort matters more than brand names at the start.
If you want help choosing value-first gear without getting buried in marketing fluff, Budget Loadout is a good place to keep researching. Its guides focus on practical trade-offs, durability, and real-world gaming performance so you can build a setup that feels good to use and doesn’t waste your budget.
Related Articles