Most advice on how to overclock your CPU starts in the wrong place. It starts with max clocks, benchmark screenshots, and voltage bravado. That’s useful if you’re chasing leaderboard numbers. It’s bad advice if you built a value-focused gaming PC and want it to stay reliable.
A better approach is simple: treat overclocking like tuning, not gambling. For a budget gamer on a Ryzen 5 or Core i5 with a stock cooler or an affordable tower cooler, the win isn’t a flashy screenshot. The win is a modest, repeatable boost that keeps your PC stable in the games you regularly play, whether that’s higher minimum FPS in a CPU-bound shooter, steadier frame pacing in an MMO, or a little more headroom while gaming and streaming at the same time.
- Overclocking a budget CPU is worth it mainly for unlocked chips with a decent cooler; locked chips and weak cooling cap the gains.
- Go slow: raise the multiplier in small steps, add voltage only when needed, and stress-test after every change.
- Cooling is the real ceiling. A good budget air cooler or entry AIO often unlocks more headroom than any single BIOS setting.
- Watch temperatures and stability over raw clock speed: keep sustained loads under about 85 C and stop when stability gets fragile.
- Know when to stop. Chasing the last 100 MHz usually means big voltage and heat for almost no real-world gain.
Table of Contents
Is Overclocking Worth It for a Budget Build
If you listen to a lot of forum chatter, overclocking sounds like something only extreme enthusiasts should bother with. That’s outdated thinking. For a budget build, a careful CPU overclock can still make sense because it’s one of the few ways to squeeze more out of hardware you already own.
That said, the free performance isn’t free. You’re trading more heat, more tuning time, and some long-term wear for extra speed. One published example estimated that a CPU running at stock could last 16 years at an average of four hours per day, while the same chip overclocked under the same cooling conditions would fail after 12.6 years, a reduction of roughly 21% in projected service life according to Overclockers on CPU lifespan and heat trade-offs.
Where overclocking actually helps
A budget gamer usually notices CPU tuning most in situations where the processor, not the graphics card, is the bottleneck.
MMO and strategy games: Large battles, crowded cities, and simulation-heavy moments often lean hard on the CPU.
High refresh FPS gaming: If you’re trying to hold higher frame rates at settings that don’t fully stress your GPU, CPU clocks can matter more.
Gaming while streaming: A little extra CPU headroom can smooth things out when background tasks and game logic stack up.
Practical rule: If your system already runs cool, stable, and CPU-bound in the games you care about, overclocking is worth considering. If your case airflow is poor and your temperatures are already high, fix cooling first.
What doesn’t work for budget builders
Blindly copying someone else’s settings is the fastest way to waste time. Two identical CPUs can behave differently. Motherboard power delivery, cooler mounting, case airflow, and even room temperature all change the result.
You also don’t need expensive liquid cooling just to try a modest overclock. A decent air-cooled system with solid build quality and reasonable thermal headroom can handle the kind of tuning that makes sense for value-focused gamers. If you’re still planning the rest of your setup, this guide to a best 1080p gaming PC setup is a useful reference for balancing parts instead of overspending in the wrong place.
For many users, the smart target isn’t “maximum stable.” It’s “stable enough to keep forever.” If you’re still deciding whether your chip is worth the effort, it helps to compare where it sits against current value options in this guide to the best CPU for gaming.
The Pre-Flight Checklist Before You Overclock
A lot of first attempts fail before the BIOS even opens. The problem usually isn’t skill. It’s hardware, cooling, or missing prep.
Check whether your platform can actually do it
Not every CPU and motherboard combination gives you meaningful manual overclocking control. You need an overclockable CPU and a motherboard that supports the relevant tuning features. Just as important, the board needs decent build quality in its power delivery because unstable power and weak cooling around that area can limit a safe overclock long before the CPU itself does.
For a budget-conscious build, that doesn’t mean buying the most expensive board in the lineup. It means avoiding the cheapest option if it cuts corners on VRM cooling, BIOS support, or long-term durability.
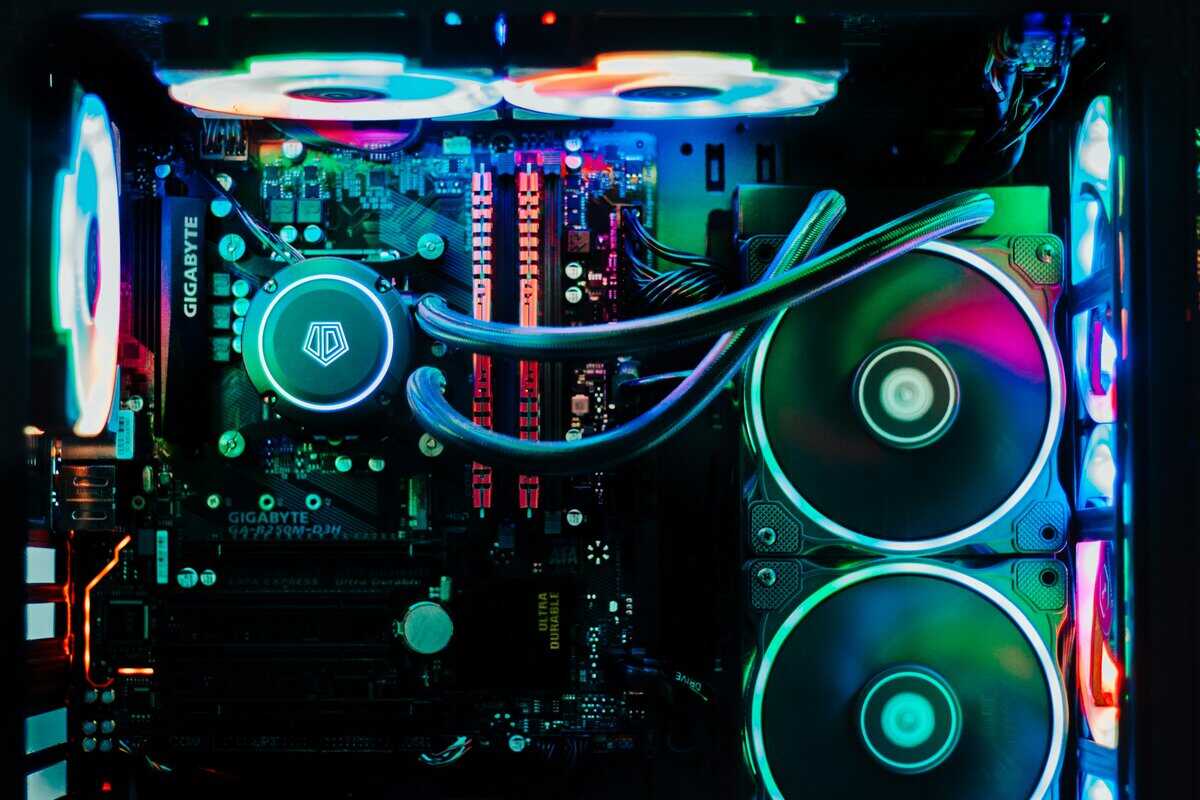
Your cooler matters more than your ambition
Stock coolers are fine for stock settings. That doesn’t mean they’re ideal for sustained manual overclocking.
A modest tower air cooler is usually the value play because it improves thermal headroom without turning your budget build into a money pit. That extra headroom is what gives you room to tune safely and hold clocks without the fan noise getting annoying during long gaming sessions.
If you want a practical place to start, look through this roundup of the best budget CPU cooler and focus on models known for reliable mounting pressure, decent fan quality, and good long-term durability.
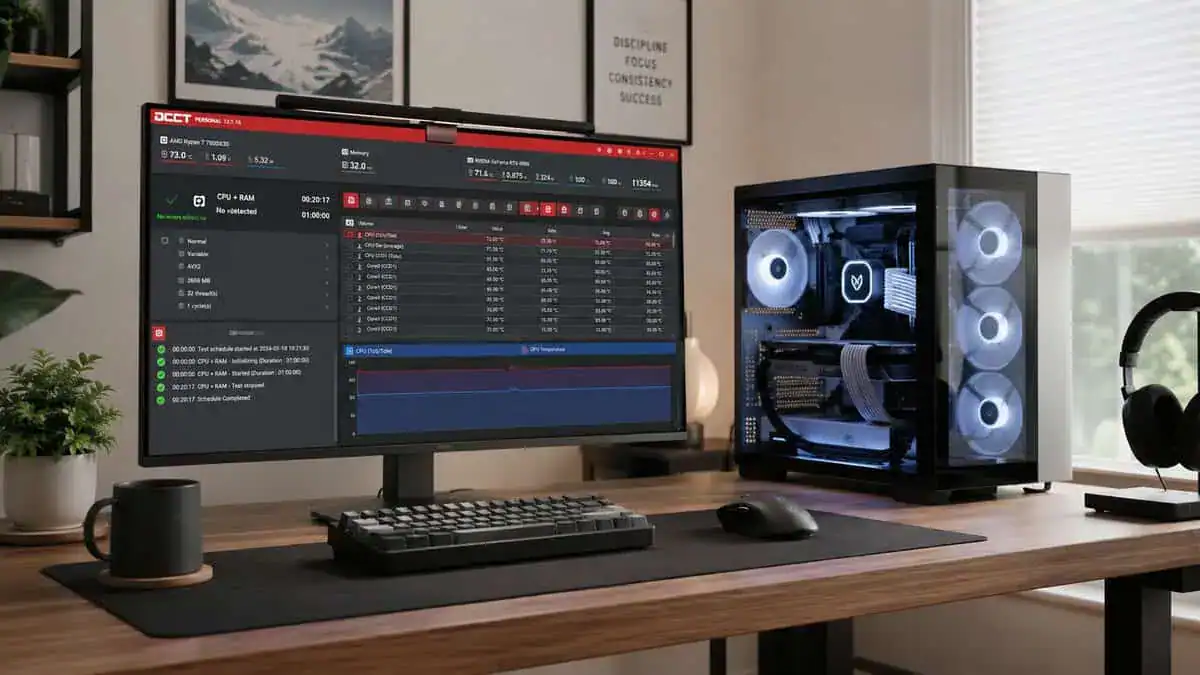
Build your software toolkit before touching settings
Install your monitoring and validation software first. Don’t make changes and then scramble for tools after the system crashes.
Use a small toolkit with clear jobs:
Validation tool: Confirms the CPU is running at the clocks you set.
Hardware monitor: Tracks temperatures, voltages, clock behavior, and throttling signs.
Benchmark or render test: Gives you a repeatable baseline so you can tell whether a change helped or just added heat.
Before changing anything, save your current BIOS profile if your board supports it. If the system becomes unstable later, restoring a known-good profile is much faster than rebuilding settings from memory.
Protect yourself from dumb mistakes
Overclocking rarely corrupts hardware instantly when done carefully, but crashes can still wreck open files or interrupt updates. Back up what matters before you start. If you don’t already have a simple backup routine, this overview of types of business backup is worth reading because the core logic applies to home PCs too. Important files should exist in more than one place.
Run one benchmark at stock settings and note how the system behaves. Watch idle temperature, load temperature, and whether the CPU already boosts as expected. If the machine is unstable at stock, noisy under light load, or clogged with dust, stop there. Overclocking won’t fix a weak foundation.
Navigating Your BIOS and Finding Key Settings
The BIOS looks intimidating because every manufacturer names things a little differently. The good news is that manual CPU tuning usually revolves around just a few settings.

The three settings that matter most
CPU Core Ratio, sometimes called the multiplier, is the main speed control. This is the number you’ll adjust first.
CPU Core Voltage, often labeled Vcore, feeds the CPU the electrical headroom it needs to hold higher clocks. More voltage can improve stability, but it also increases heat. That’s why sloppy voltage tuning causes more problems than the frequency change itself.
Load-Line Calibration, often shortened to LLC, affects how the board manages voltage behavior under load. Too weak and the voltage can dip more than you want. Too aggressive and the board can overshoot harder than needed. For a first overclock, the point isn’t to master every LLC level. It’s to avoid extremes and keep behavior predictable.
Where these settings usually live
Most boards group these options under names like OC, Tweaker, AI Tweaker, or Advanced Frequency settings. Brand labels differ, but the logic stays the same. Look for CPU ratio controls first, then manual or adaptive core voltage settings, then LLC.
A quick way to stay oriented is to ignore everything unrelated to CPU tuning on your first pass. Don’t wander into memory timings, fabric settings, or power features unless you know why you’re changing them.
| Setting | What it controls | Beginner approach |
|---|---|---|
| CPU Core Ratio | Target CPU clock behavior | Raise in small steps |
| CPU Core Voltage | Stability headroom | Change only when needed |
| Load-Line Calibration | Voltage behavior under load | Use a moderate setting |
What to leave alone at first
Most beginners get into trouble by changing too many settings at once. If you adjust the multiplier, voltage, LLC, memory profile, and power limits together, you won’t know which change caused the crash.
Keep the first pass simple:
Touch the multiplier first: It gives you the cleanest read on what the chip can do.
Use manual changes sparingly: Don’t jump straight into aggressive voltage tuning.
Leave RAM tuning separate: If a game crashes later, you want to know whether the CPU or memory caused it.
A stable CPU overclock is easier to diagnose when the rest of the system stays boring.
This is also where people lose perspective and start chasing every bottleneck at once. Don’t. CPU clocks, memory capacity, and GPU load all affect gaming differently. If you’re unsure how system memory fits into the bigger picture, this breakdown of how much RAM for gaming helps separate CPU tuning from other upgrade decisions.
The Incremental Tuning and Testing Cycle
This is the part that matters most. Safe overclocking isn’t about finding one magic number. It’s a loop.
Intel’s guidance describes the core method clearly. Raise the processor multiplier in very small steps, typically +1 at a time, with each +1 multiplier step adding about 100 MHz to the target frequency according to Intel’s overclocking guide. That’s the model worth following because instability can show up right away after a change.
How to overclock your CPU step by step
Start at stock settings with your baseline benchmark score already recorded. Enter BIOS, raise the CPU multiplier by one step, save, reboot, and run the same quick benchmark again.
If the system boots normally and completes the test without obvious issues, repeat the process. If it crashes, freezes, fails to boot cleanly, or throws errors, you’ve found a limit that needs more caution.
A simple example looks like this:
Baseline at stock: Record score, temperatures, and observed boost behavior.
First increase: Move from a 42x ratio to 43x.
Quick validation: Boot into the OS and run one short, repeatable benchmark pass.
Observe the result: If it’s clean, go back and try the next small step.
Why small steps beat big jumps
Big jumps feel faster because you spend less time rebooting. They’re slower in practice because you lose the trail. If the machine becomes unstable after a large change, you won’t know whether the problem is frequency, voltage demand, heat, or board behavior under load.
Small steps keep the process honest.
You isolate variables
You catch problems early
You avoid overshooting into unnecessary heat
You can back off one notch and keep a stable daily setting
When to touch voltage
Voltage is where many budget overclocks go wrong. If a small multiplier increase fails, don’t assume you should immediately add a large voltage bump. More voltage often creates a heat problem faster than it creates a usable gaming gain.
For a value-focused daily overclock, stop and ask a practical question: did the last change help enough to justify more fan noise and more heat? If the answer is no, that’s a good place to call it done.
The best beginner overclock is often one step below the edge, not right on it.
That approach works especially well on mainstream chips paired with affordable air coolers. You won’t win screenshot contests, but you’re much more likely to keep a PC that stays stable through long gaming sessions instead of crashing halfway through a raid or ranked match.
Stress Testing for Long-Term Reliability
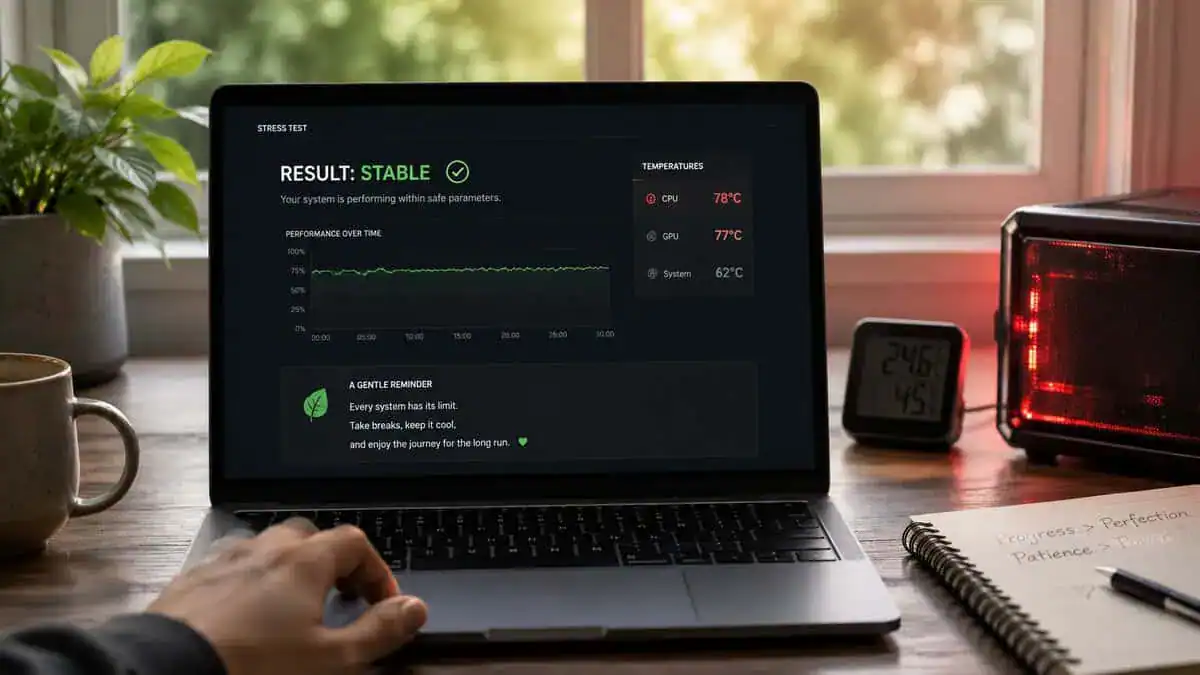
A quick benchmark only tells you the system can survive a short burst. It doesn’t prove daily stability. Real stability means your overclock can handle heavy load without errors, dangerous heat, or hidden throttling.
What stability actually looks like
Independent beginner guidance commonly recommends running a benchmark or stress test for about 1 hour after each adjustment, while watching temperatures in monitoring software and avoiding large voltage jumps because auto settings can overcompensate and push unsafe thermals, as noted in this beginner CPU overclocking guide.
That one-hour pass isn’t a guarantee that every workload will behave perfectly. It is a practical filter. Unstable overclocks often reveal themselves as failed boots, app crashes, or blue screens during this stage rather than later when you’re in the middle of a game.
What to monitor during the test
Don’t just start a stress test and walk away. Watch the right signals.
Core temperatures: If they climb into territory you’re not comfortable running every day, the overclock isn’t worth it.
Clock behavior: A high advertised clock means little if the CPU keeps dropping under load.
System errors or crashes: One error is enough to reject a daily overclock.
Fan behavior and noise: Budget systems live on desks and in bedrooms. If the noise becomes annoying, that matters.
The article brief for this guide asked for value and durability, and in this context, it matters most. A stable overclock on an affordable air cooler should still feel usable in real life. If the fan curve becomes harsh, the case gets heat-soaked, or the clocks bounce around under load, the settings may be technically functional but still poor for daily gaming.
A practical pass or fail standard
Use a simple table when you test so you don’t rely on memory.
| Result | What it means |
|---|---|
| Test completes, no errors, temps stay controlled | Keep testing in your real games |
| Test completes, but temps or noise are too high | Reduce the overclock or improve cooling |
| Crash, blue screen, freeze, or failed boot | Back off immediately |
Watch for the overclock your games can actually live with, not the one your PC can barely survive.
If you’re unsure what normal heat behavior looks like before you tune further, this guide to normal CPU temp gives a useful reference point for everyday use versus stress conditions.
Common Pitfalls and Knowing When to Stop
Most bad overclocks don’t fail because the user lacked courage. They fail because the user ignored small warning signs and kept pushing.
The mistakes that waste time
One common mistake is adding voltage too early. Another is assuming every crash comes from the CPU. In a lot of first builds, memory profiles, weak case airflow, or motherboard thermals muddy the picture.
Watch for these red flags:
Random game crashes after a “stable” benchmark: Your quick tests were not enough.
Blue screens or failed boots: The system is telling you the margin is gone.
Performance that gets worse under load: Heat or throttling is eating the gain.
Noise that makes the PC unpleasant to use: The overclock may be technically stable but practically bad.
The smartest stopping point
The right place to stop is usually before the first ugly compromise. If one more multiplier step requires noticeably more voltage, noticeably more fan noise, or clearly higher temperatures, the value proposition is gone.
That matters more on budget hardware because build quality and cooling limits shape the whole experience. A reliable daily machine is worth more than a fragile benchmark result.
If you have to talk yourself into keeping the last step, roll it back.
What about laptops and small systems
Laptop overclocking gets oversold. In practice, guides warn that mobile and small-form-factor systems often hit power and temperature limits long before a stable overclock is useful. For many laptops, undervolting, fan tuning, or leaving boost behavior alone is the better-value move according to Avast’s CPU overclocking guidance for laptops and thermals.
That same logic often applies to compact desktops too. Tight airflow and smaller coolers reduce your margin for error. If you’re deciding whether better cooling is worth it before you tune further, this comparison of AIO vs air cooler helps frame the trade-offs without assuming you need expensive hardware.
Frequently Asked Questions
Quick answers to the most common questions about how to overclock your CPU safely.
Is overclocking your CPU safe?
Yes, if you go slow and watch temperatures. Modern CPUs and motherboards throttle or shut down before damage occurs, so the real risk comes from large voltage jumps. Raise settings in small steps and stress-test after each change.
Will overclocking void my CPU warranty?
Often, yes. Most CPU makers treat overclocking as outside their warranty, even on unlocked chips. The chance of actually killing a modern CPU with a careful, modest overclock is low, but know you are accepting that risk before you start.
How much faster will my CPU be after overclocking?
On a budget chip, expect a modest but real gain, often a few percent up to around 10 percent in CPU-bound tasks. Many games see smaller gains because the GPU is the bottleneck. The benefit is biggest in heavy multi-core work and 1080p gaming.
Do I need a better cooler to overclock?
Usually yes. Overclocking raises heat output, and a stock cooler often cannot hold temperatures in a safe range. A solid budget air cooler or entry AIO gives you the thermal headroom to push higher and stay stable.
What temperature is too high when overclocking?
As a rule, keep sustained load temperatures under about 85 C, and treat anything approaching 90 to 95 C as a sign to back off. Brief spikes are normal, but if your CPU sits near its thermal limit during a stress test, reduce the overclock or improve cooling.
If you’re building a gaming setup around long-term value, Budget Loadout is a solid place to keep researching. The site focuses on practical upgrades, durable gear, and real-world trade-offs so you can spend where it matters and skip the parts that only look good in marketing.
Related Articles