Gaming desk setup ideas don’t have to be complicated or expensive. Building a functional station is about making smart choices for your space, budget, and the games you play. This guide focuses on value, ergonomics, and performance.
- A well-planned desk setup matters more than spending big — most essentials like monitor arms and cable trays cost under $30
- This guide covers five distinct budget setups from minimalist to streaming-ready, each under $200 total
- Ergonomics should come first: proper monitor height and keyboard position prevent strain during long sessions
- Dual-purpose furniture like a large mousepad that doubles as a desk mat saves money and desk space
- Good cable management costs almost nothing but transforms the look of any setup — velcro ties, cable trays, and adhesive clips are under $15 total
Table of Contents
A Practical Guide to Gaming Desk Setups
A well-planned gaming environment is more accessible than many think. Whether you are a competitive FPS player needing maximum mouse space, an MMO enthusiast with multiple hotbars, a streamer, or a professional who games after hours, a deliberate setup improves the experience.
This guide presents practical gaming desk setup ideas for real-world scenarios with specific product recommendations for different needs and budgets, prioritizing build quality and long-term value.
Quick Guide to Gaming Desk Setups
Use this table to find the setup that best matches your situation.
| Setup Idea | Best For | Budget Tier | Key Focus |
|---|---|---|---|
| The Compact Battlestation | Dorm rooms & small apartments | $-$$ | Maximizing performance in tight spaces for FPS or general gaming. |
| The Dual-Purpose Hub | Work-from-home professionals | $$-$$$ | Seamless transition between productivity and any gaming genre. |
| The Entry-Level Streamer Rig | Aspiring content creators | $-$$ | Balancing on-camera appeal with affordability for streaming any game. |
| The Ultimate Console Corner | Living room & den gamers | $-$$ | Comfort, ease of use, and a clean living space. |
| The Student Gamer Setup | High school & college students | $ | Versatility for balancing schoolwork and gaming. |
Each of these setups addresses a common challenge. Let’s get into the details.
Choosing the Right Foundation: Your Desk
The desk is the foundation for your equipment. Stability and build quality are non-negotiable. A wobbly desk is distracting during an intense FPS match, and a surface that can’t support your monitor and PC is a risk to your hardware.
Materials and Durability
A desk’s material directly impacts its stability and longevity.
MDF (Medium-Density Fiberboard): This is common for budget desks. It’s affordable, but its primary tradeoff is low moisture resistance and a tendency to sag under heavy loads over time. If choosing MDF, look for a model with a thick, durable laminate finish for better protection.
Solid Wood: Known for unmatched durability and a classic appearance, solid wood is a long-term investment. Its main disadvantage is its high cost. It is also heavy and requires occasional maintenance.
Steel Frames: A steel frame provides excellent stability. Pairing a steel frame with an MDF or particleboard top delivers reliable support without the high cost of solid wood. This combination offers the best value for most budget-conscious gamers.
Shape and Size for Different Use Cases
Rectangular Desks: This is the standard for good reason. A rectangular desk at least 48 inches wide and 24 inches deep provides enough room for a single monitor and peripherals without feeling cramped. A depth of 30 inches is preferable, as it allows you to position your monitor at a proper viewing distance to reduce eye strain.
L-Shaped Desks: These are functional for gamers who also work from home or need a multi-purpose station. You can dedicate one side to gaming and the other to work. The tradeoff is their large footprint. They require significant corner space and can be more complex to assemble.
A desk height between 28 and 30 inches is optimal for most adults. This allows your feet to rest flat on the floor with your knees at a 90-degree angle, which is essential for preventing back and leg strain during long sessions.
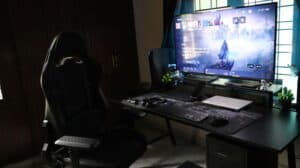
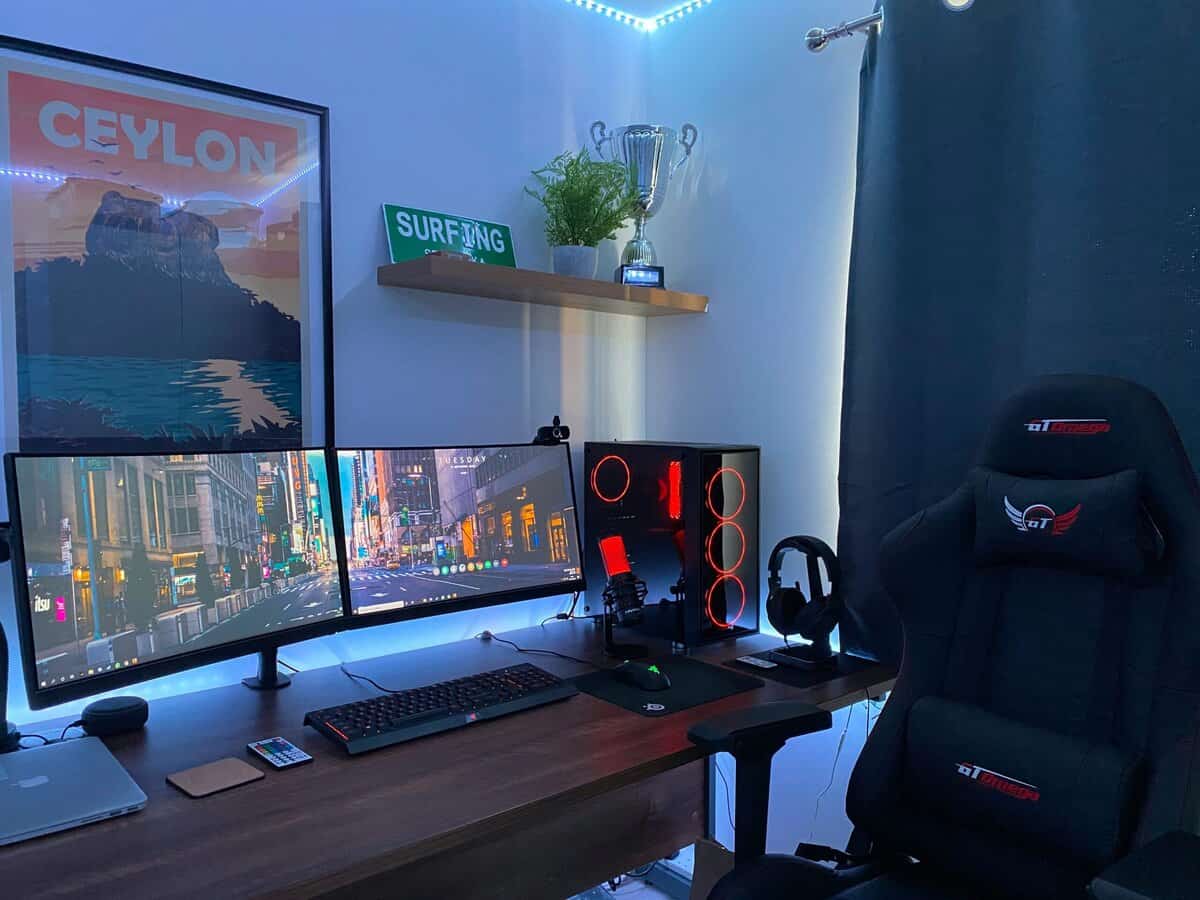
Setup One: The Compact Battlestation
This blueprint is for gaming in a dorm, apartment, or any room where space is limited. The compact battlestation focuses on maximizing performance in a tight area. The objective is a clean, functional setup for competitive play.
Use Case: Ideal for FPS gamers who need ample mouse room or anyone needing an efficient single-monitor setup.
The foundation is a desk under 48 inches wide. A desk like the Casaphoria Electric Standing Desk (42″) works well. Its steel frame provides the build quality needed to prevent monitor wobble, a common failure point of cheaper particleboard desks.
Vertical Space Management
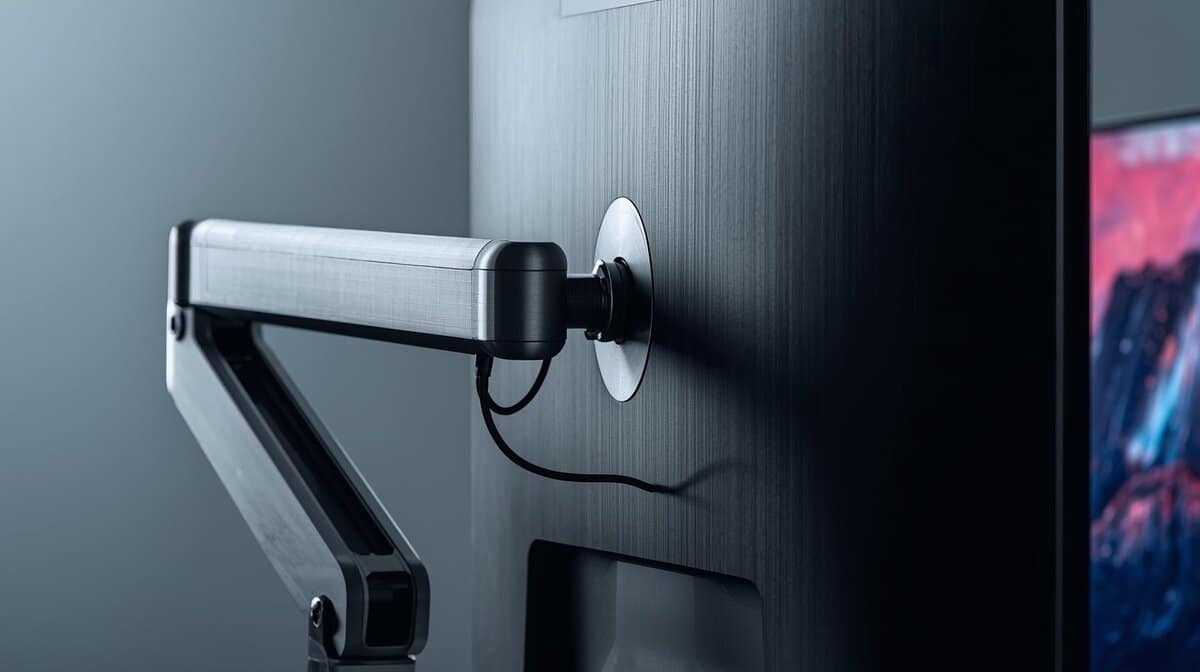
When you cannot build outwards, build upwards. A monitor arm is the most effective way to reclaim desk space. It lifts your screen off the desk, freeing up the area its stand occupied. This gives you more real estate for your keyboard and mousepad. A gas spring arm like the HUANUO Single Monitor Mount offers easy adjustment without a high price tag. Wall-mounted shelves can also hold controllers, headsets, or decor, keeping your main surface clear.
Peripherals for Tight Quarters
Bulky peripherals are not suitable for a compact setup. To maintain enough room for mouse movement, especially for low-sensitivity FPS players, you need space-saving gear.
Tenkeyless (TKL) Keyboards: A TKL keyboard like the Keychron V3 or SteelSeries Apex Pro TKL removes the number pad, freeing up several inches of desk space without compromising on switch performance. For even more space savings, 60% and 65% layouts cut the footprint further. Check our guide to the best gaming keyboards under $50 for compact options that won’t stretch your budget.
Lightweight Mice: A smaller, lighter mouse like the Logitech G Pro X Superlight or Razer Viper V2 Pro is easier to maneuver in a limited area and reduces wrist fatigue.
The biggest tradeoff with a compact setup is the lack of room for extras. You must be selective with your gear. There is little space for a second monitor or streaming equipment. Cable management is also critical since a small desk becomes cluttered fast. Keep cables bundled and routed under the desk to maintain usable surface area.
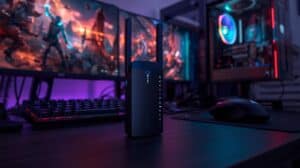
Setup Two: The Dual-Purpose Productivity Hub
This setup is for the work-from-home professional who is also a gamer. It creates a clean, versatile desk that can switch from productivity tasks to gaming. This is about building an integrated command center, not just placing two computers on a desk.
Use Case: Perfect for those who split their time between a work laptop and a gaming PC, regardless of genre.
The foundation is a larger desk, either a 55- to 63-inch rectangular model or an L-shaped desk. A wide rectangular desk like the UPLIFT V3 offers a large, clean surface. A compact option like the PayLessHere 39″ Z-Shaped Gaming Table allows for physical separation of work and play zones. A desk with a solid steel frame is necessary to prevent wobble and sagging.
The KVM Switch: The Central Hub
The key component of this setup is the KVM (Keyboard, Video, Mouse) switch. This device lets you share a single keyboard, mouse, and monitor setup between your work laptop and gaming PC. With a button press, you toggle your peripherals from one machine to the other.
A reliable 2-port KVM switch like the TESmart HDMI 2.0 that supports your monitor’s resolution and refresh rate is a worthwhile investment. It eliminates the need to unplug and replug cables daily, which saves time and reduces wear on your ports.
Peripherals for Dual Duty
To maintain a clean, professional look, choose gear that performs well for gaming but doesn’t scream “gamer.”
Keyboard: A mechanical keyboard with quiet tactile switches, like Cherry MX Browns, is a good choice. The Logitech MX Mechanical provides a solid typing experience for work and is responsive enough for gaming without loud clicks.
Mouse: A high-performance mouse with customizable profiles works well here. The Logitech G502 X lets you program a button to switch between a low-DPI setting for precise work and a high-DPI profile for gaming. Its shape is ergonomic for long workdays but still suitable for competitive play.
Tradeoffs: This setup has two main compromises. First, it is more expensive due to the larger desk and the cost of a KVM switch. Second, it requires a more understated aesthetic, which means avoiding flashy RGB-heavy designs if you need to maintain a professional look for video calls.
Setup Three: The Entry-Level Streamer Rig
This setup is for getting into streaming by balancing a professional on-camera look with a practical budget. It is designed to provide a clean, engaging broadcast without studio-grade equipment. The focus is on investing in components that directly impact viewer experience.
Use Case: Ideal for aspiring content creators who need space for dual monitors (one for gameplay, one for stream management) and audio/video equipment.
The core of this rig is a desk around 60 inches wide. This size provides enough room for two monitors, a microphone, and a camera without feeling cramped. A desk with a durable steel frame is essential to keep the camera shot stable.
Creating an On-Camera Look
Your background and lighting are as important as your gameplay. You don’t need expensive acoustic panels or professional lighting kits.
Two budget-friendly key lights like the Logitech Litra Glow placed in front of you can dramatically improve your webcam’s image quality. Behind the desk, an RGB LED strip adds color and visual depth to make your shot more dynamic.
Core Gear for Value-Focused Streaming
You can achieve good broadcast quality with affordable gear by selecting products known for their performance-to-price ratio.
Microphone: A USB condenser mic like the HyperX SoloCast delivers clear audio, a significant upgrade over a headset mic. Its cardioid pickup pattern focuses on your voice and helps reduce background noise like keyboard clicks.
Webcam: The Logitech C920 provides a sharp 1080p picture suitable for a facecam without the cost and complexity of a mirrorless camera setup.
The main tradeoff with this setup is polish. It will not have the audio isolation of a sound-treated room or the lighting of a professional studio. But it delivers a quality viewer experience that is more than sufficient for building an audience.
Managing Cables for Streaming
A streaming setup involves more gear and more cables. A microphone boom arm is a necessary upgrade. It gets the mic off the desk, allows for perfect positioning, and provides a channel to hide the USB cable. Beyond that, keep cable routing tight using the techniques in the cable management section below.
Setup Four: The Ultimate Console Corner
This blueprint is for gamers who play primarily from the couch or a comfortable chair in a living room, den, or bedroom. The console corner focuses on comfort and a clean living space. The objective is a setup that looks good in a shared room and keeps gaming gear organized without taking over the space.
Use Case: Ideal for PS5, Xbox Series X, or Nintendo Switch players who want a comfortable, living-room-friendly setup that doesn’t require a traditional desk.
The foundation here is not a desk at all. A media console or TV stand between 48 and 60 inches wide provides the surface area needed for a console, a few accessories, and cable routing. A stand with enclosed shelving or cabinets, like the Gizoon TV Stand or the FITUEYES Floor TV Stand, keeps consoles ventilated while hiding controllers, charging cables, and game cases behind closed doors. This is critical in shared living spaces where a pile of gaming gear creates friction.
If you prefer a dedicated gaming monitor over a TV, a compact desk in a corner works. A monitor brings lower input lag and faster response times than most TVs, which matters for competitive multiplayer.
Comfort Without a Desk Chair
Console gaming sessions are often longer than PC sessions, and most people underestimate how much their seating affects fatigue.
Lumbar Support: A firm lumbar pillow placed behind your lower back prevents the slouching that leads to soreness during long sessions. This is more effective and cheaper than replacing your couch.
Arm Positioning: If you game with a controller for hours, your arms should be supported. Wide armrests or a pillow across your lap keeps your elbows from floating, which reduces shoulder strain.
A footrest can also improve posture by keeping your thighs parallel to the floor, especially on deeper couches where your feet don’t reach the ground naturally.
Audio for Shared Spaces
Sound is the biggest source of tension for console gamers in shared living spaces. A budget gaming headset solves the noise problem entirely and gives you better positional audio than any soundbar or TV speaker. For daytime use when a headset feels unnecessary, a compact soundbar like the Creative Stage SE provides a meaningful upgrade over built-in TV speakers without the cost of surround sound.
Cable Management Behind the Console
Console setups generate a surprising number of cables: power, HDMI, Ethernet, controller charging, and external storage. Adhesive cable clips along the back of the stand keep HDMI and power cables from drooping into view. A small cable box on a lower shelf hides the power strip entirely. For the full approach, see the cable management section below.
The biggest tradeoff with a console corner is limited expandability. There is no room for a keyboard and mouse, a microphone, or a second screen. This setup prioritizes simplicity and living space aesthetics over flexibility.
Setup Five: The Student Gamer Setup
This blueprint is for high school and college students who need a single station that handles homework, video calls, and gaming without separate setups for each. The student gamer setup focuses on versatility and budget. The objective is a space that transitions between schoolwork and gaming with minimal effort and minimal spending.
Use Case: Ideal for students in dorms, small bedrooms, or shared apartments who need one desk for studying, writing papers, attending online classes, and gaming.
The foundation is a desk between 40 and 48 inches wide. You need enough room for a monitor or laptop, a keyboard, and a textbook or notebook open beside it. A desk like the SHW Home Office 40-Inch or the CubiCubi 47-Inch provides adequate surface area with a steel frame that won’t wobble during gaming. Both are under $60 and ship flat for easy dorm room assembly.
The key advantage of this setup is that it avoids duplication. Instead of a separate study area and gaming area, everything lives on one desk. The tradeoff is that you must keep it organized, because a cluttered desk is equally bad for studying and for gaming.
The Laptop-Plus-Monitor Approach
Most students already own a laptop for schoolwork. Adding an external monitor creates a dual-screen setup that dramatically improves both productivity and gaming without replacing the laptop.
Use the external monitor as your primary gaming display. It provides a larger screen, faster refresh rate, and better response time than a laptop panel. During study sessions, use the laptop screen for research or notes while the monitor displays your paper or project. A budget 1080p monitor with a 75Hz or 144Hz refresh rate is the sweet spot. Connect it with a single HDMI cable from your laptop and you have a functional dual-screen workstation.
Peripherals That Pull Double Duty
Students don’t have the budget for separate work and gaming peripherals. Choose gear that performs well for both.
Keyboard: A compact mechanical keyboard is the best investment for a student. It is better for typing papers than a membrane board and better for gaming than a laptop keyboard. A TKL or 60% layout saves desk space for textbooks.
Mouse: A basic gaming mouse with adjustable DPI works for both precise document editing and gaming. A reliable wired option like the Logitech G203 runs under $30 and handles both tasks without issue.
Headset: A headset with a decent microphone handles Discord, online lectures, and in-game chat. Look for one with a detachable or flip-up mic so it looks less conspicuous during video calls for class.
For students in shared dorm rooms, quiet keyboard switches make a real difference. Gaming at 2 AM with a loud clicky keyboard is a fast way to create roommate conflict.
Keeping It Together on a Budget
Students move frequently. Dorms change yearly, apartments shift, and gear needs to survive being packed and unpacked. Skip the monitor arm if you are in a dorm. Most dorm desks have odd thicknesses or policies against clamping accessories to furniture. A simple monitor stand or riser is cheaper, more portable, and elevates the screen to a better viewing height while creating storage space underneath for textbooks.
For cable management, a single Velcro cable sleeve bundling your monitor, charger, and peripheral cables is sufficient. Don’t over-invest in cable management solutions you will leave behind when you move out.
The biggest tradeoff with the student setup is performance ceiling. This is not a battlestation. You are optimizing for flexibility and budget, not for the best possible gaming experience. But for a student who needs one desk to do everything, that is exactly the right tradeoff.
Mastering Ergonomics and Cable Management
An expensive setup is ineffective if it causes discomfort, and a powerful PC looks messy with a tangle of wires. A great station is defined by comfort and organization.
Building a Foundation of Comfort
Start with your posture. The 90-90 rule is a reliable guide: sit with your feet flat on the floor, your knees bent at approximately 90 degrees, and your elbows bent at another 90 degrees resting at desk height.
Monitor Height: The top edge of your screen should be at or just below eye level. This prevents you from tilting your neck up or down. A budget monitor arm is the best tool for this adjustment.
Wrist Position: Keep your wrists straight when typing and using the mouse. Avoid bending them upwards. A foam wrist rest can help, but correct chair and desk height is the primary solution.
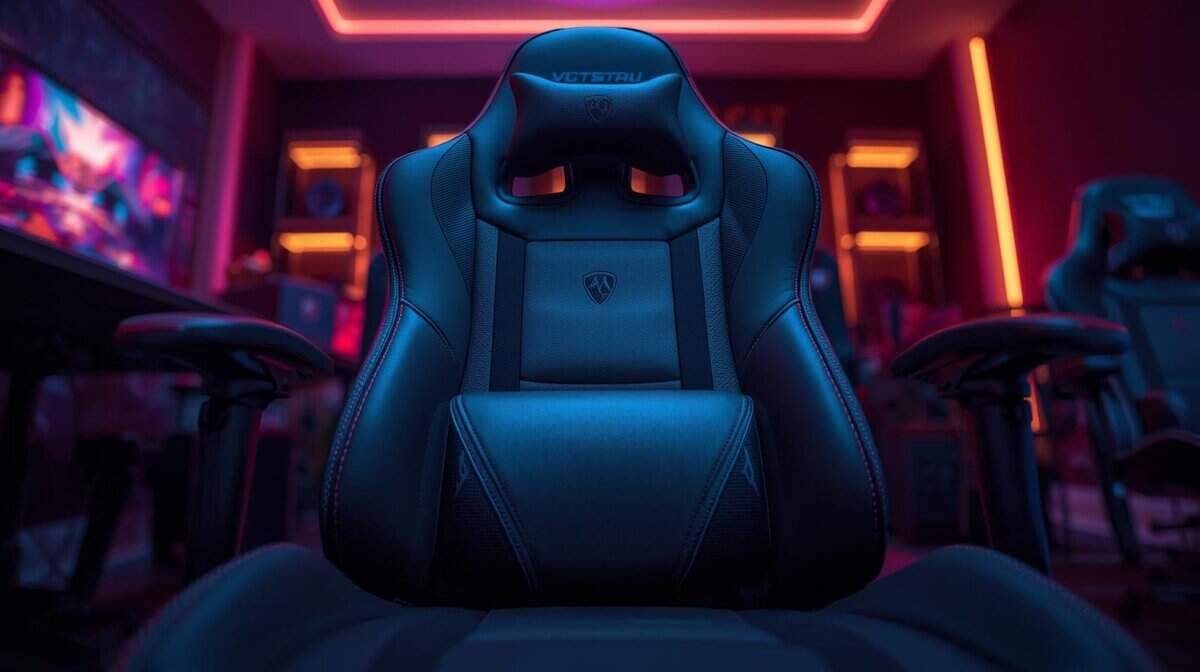
The Chair Question: A high-quality chair is a direct investment in your long-term health. If you have to prioritize spending between a chair and a desk, start with the chair. A good chair provides critical back support and promotes better posture that prevents pain during long sessions. You can always improve a basic desk later with a monitor arm or other accessories, but it’s hard to fix a bad chair. For a deeper breakdown of what to look for, see our gaming chair vs office chair comparison.
Proper ergonomics is not a one-time fix but a process of continuous adjustment. If you feel strain, change your setup. A small tweak can prevent long-term discomfort.
A Tiered Approach to Cable Management
A clean desk reduces distractions and looks better. You don’t need a large budget to manage your cables.
Beginner (Low Cost): Reusable Velcro straps are a cheap and effective first step. Group cables running to the same location and cinch them together. This alone makes a noticeable difference.
Intermediate (Better Results): J-channel raceways are plastic tracks that stick to the back or underside of your desk. You place your cables inside to hide them. They provide a cleaner look than straps alone and allow for easy cable changes.
Advanced (Cleanest Look): For a professional appearance, combine a cable sleeve with an under-desk power strip box. The sleeve bundles all wires from your PC into one tube. The box hides the power strip and its plugs completely from view.
Common Questions About Gaming Desk Setups
How much space do I need for a gaming desk?
For a single-monitor rig, a desk at least 40 to 50 inches wide and 24 to 30 inches deep is recommended. This provides enough elbow room and space for wide mouse movements. If you plan to use dual monitors for streaming or multitasking, 55 to 60 inches wide or more is better. Always measure your space and check gear dimensions before buying.
Is an L-shaped desk good for gaming?
An L-shaped desk can be a solid solution for dividing a space into distinct zones for gaming and work. They are effective at using corner space. The main tradeoff is their large footprint. They take up more floor space than a rectangular desk and can be more difficult to assemble. For pure gaming in a smaller room, a large rectangular desk is often more practical.
Should I invest more in a chair or a desk?
Start with a high-quality ergonomic chair. A good chair is a direct investment in your health, providing back support and promoting better posture. You can always improve a basic desk later with a monitor arm or other accessories. It is much harder to fix a bad chair.
For more honest reviews and practical guides on building a high-value setup, explore the resources at Budget Loadout. We focus on helping you find the best gear for your money. Learn more at https://budgetloadout.com.
Related Articles